
How to Seal Gaps at the Top of Your Garage Door? To seal a gap at the top of a garage door, use weatherstripping and attach it to the doorstop and/or the top panel of the garage door. Sealing gaps at the top of garage doors is essential for energy efficiency and reducing outside noise.
If you notice any gaps between the door and the jamb, it’s time to take action. One effective solution is to use weatherstripping tape and attach it to the top panel or the doorstop of the garage door. This will create a seal that keeps out unwanted drafts and noise. Alternatively, you can use a garage door threshold seal to seal larger gaps and prevent pests from entering. By sealing the gap at the top of your garage door, you’ll improve your garage’s energy efficiency and protect your belongings from moisture and dust.
Let’s dive into the question of how to Seal Gaps at the Top of Your Garage Door.
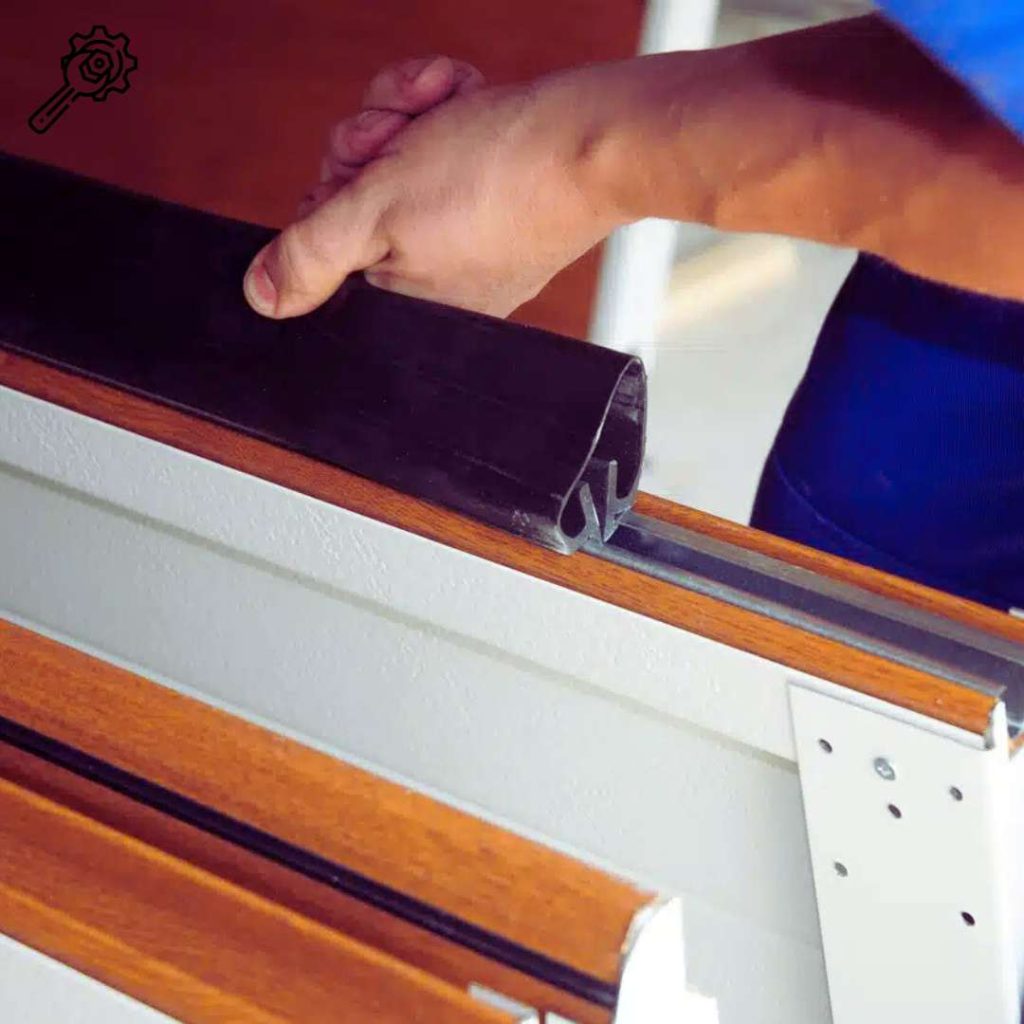
Table of Contents
Identifying The Gaps
Garage doors often develop gaps at the top, allowing unwanted elements such as rainwater or debris to enter. To seal these gaps effectively, the first step is to identify them accurately.
- Visual inspection: Start by visually inspecting the top edge of your garage door, as gaps may be visible to the naked eye. Look for spaces between the door and the frame.
- Paper test: A simple test to identify gaps is to close the garage door on a piece of paper. If the paper gets stuck or slips out too easily, it indicates a gap between the door and the frame.
- Flashlight test: If the visual inspection is unclear, use a flashlight to identify gaps. Shine the flashlight under the door from the outside while somebody stands on the inside of the garage. The gaps will be visible in the beam of light.
Different Types Of Gaps
There are different types of gaps that could be present on a garage door.
- Weatherstripping gap: This occurs when worn-out or missing weatherstripping allows gaps to form between the garage door and its frame.
- Garage door opener gap: When the garage door opener is too weak, it can cause gaps by not closing the door properly.
- Uneven garage door: Uneven garage doors often create gaps at the top end that require sealing to prevent water and other elements from entering.
It is helpful to use images or diagrams to help identify gaps in a garage door.
By following these steps, you can identify the gaps in your garage door and select the most effective method for sealing them. Remember to inspect your garage door regularly to ensure that no new gaps have formed and to maintain its protection.
Choosing The Right Sealant
Garage doors are a crucial part of every home, as they provide security and protection from harsh weather elements. However, even with proper maintenance, gaps can form at the top of the door, allowing unwanted elements such as dirt, debris, and pests to enter through the opening.
Using the proper sealant can help prevent any infiltration, keeping your garage secure and your property safe. In this section, we’ll discuss why selecting the proper sealant is essential and explore the various types of sealants available on the market, along with their advantages and disadvantages.
Finally, we’ll provide a buyer’s guide to help you select the best sealant for your garage door.
Garage Door Weather Seal Selector
This tool helps you select the perfect weather seal for your garage door based on your specific needs and conditions.
About Garage Door Weather Seals
Common Weather Seal Types
- Bottom Seals (Threshold Seals): Attach to the bottom of the door to block drafts, water, and pests.
- Side Seals (Jamb Seals): Install along the vertical sides of the door opening.
- Top Seals (Header Seals): Seal the gap between the top of the door and the header.
- T-Seals: T-shaped profiles that fit into door tracks.
- Bulb Seals: Round, flexible seals that compress when the door closes.
Key Benefits of Proper Sealing
- Reduces energy costs by preventing heat/cool air loss
- Keeps out rain, snow, and moisture
- Blocks drafts and wind
- Prevents pests and insects from entering
- Reduces noise from outside
- Protects stored items from weather damage
Seal Maintenance Tips
- Inspect seals seasonally for wear or damage
- Clean seals with mild soap and water to remove dirt
- Check for proper compression when door is closed
- Replace seals every 3-5 years or when showing signs of wear
- Lubricate moving parts with silicone spray (not oil-based)
Related: Free Garage Door Gap Size Estimator
Discuss The Importance Of Selecting The Right Sealant Based On The Type Of Gap And Door Material
Choosing the proper sealant is crucial to ensure that it is suitable for the type of gap and door material. If the sealant is not compatible, it may not adhere properly to the surface, resulting in an ineffective seal and allowing unwanted elements to enter.
List Various Types Of Sealants And Their Pros And Cons
There are several types of sealants available in the market, each with its benefits and drawbacks.
- Silicone sealant: This sealant is a popular choice due to its durability, waterproofing properties, and flexibility. It can withstand extreme temperatures and is suitable for sealing small gaps. However, it is not ideal for significant gaps, and it may not adhere correctly to some door materials.
- Latex sealant: Latex sealant is a versatile sealant that can seal both small and large gaps. It adheres well to most door materials, is easy to apply and clean up, and dries quickly. However, it is not waterproof and may not withstand extreme temperatures.
- Polyurethane sealant: This sealant is highly durable, waterproof, and can withstand extreme temperatures. It adheres well to most materials and can seal significant gaps. However, it is challenging to apply, takes time to dry, and is difficult to clean up.
Sealant Type Comparison
| Sealant Type | Pros | Cons |
|---|---|---|
| Silicone | Durable, waterproof, flexible, handles temperature extremes | Not ideal for large gaps, may not adhere to some materials |
| Latex | Versatile, easy to apply, dries quickly, adheres well | Not waterproof, weaker against temperature extremes |
| Polyurethane | Highly durable, waterproof, handles temperature extremes, seals large gaps | Difficult to apply, slow drying, hard to clean up |
Provide A Buyer’s Guide For Selecting The Best Sealant
When selecting the best sealant, here are some factors to consider:
- Door material: Consider the type of material used in the garage door, as some sealants may not adhere well to certain surfaces, such as aluminum or vinyl.
- Gap size: Determine the size of the opening that needs sealing to select a sealant that can effectively fill the gap.
- Climate: Consider the environmental conditions in your area when selecting a sealant that can withstand extreme temperatures or high moisture levels.
- Ease of application: choose a sealant that is easy to apply and clean up, especially for diy projects.
- Drying time: Consider the drying time required before the garage is usable again.
- Budget: Determine the amount you’re willing to spend on sealant and select the best sealant within your budget.
When selecting the proper sealant for your garage door, it is essential to consider the gap size, the door material, the climatic conditions, and the ease of application. It is also crucial to choose a sealant that is budget-friendly and provides the desired features.
Preparing The Surface
A properly sealed garage door can keep out unwanted weather, pests, and debris. One of the most critical steps in achieving a well-sealed garage door is preparing the surface. If the surface is not properly prepared, the sealant may not adhere properly, resulting in leaks and gaps.
In this section of the blog post, we will discuss the importance of preparing the surface and outline the necessary tools and steps.
Explain The Importance Of Cleaning And Preparing The Surface Before Applying The Sealant
Cleaning and preparing the surface of the garage door is crucial to ensuring that the sealant will form a long-lasting bond. Any dirt, debris, or grease on the surface can compromise the sealant’s ability to adhere properly, leading to gaps and leaks.
Therefore, it is essential to thoroughly clean and prepare the surface before applying the sealant.
Detail The Tools Needed For Surface Preparation
To prepare the surface of the garage door, you will need the following tools:
- Stiff-bristled brush
- Solvent cleaner or detergent
- Clean cloth or rag
- Sandpaper or a wire brush
- Painter’s tape
Provide A Step-By-Step Guide To Preparing The Surface
- Begin by cleaning the garage door surface with a stiff-bristled brush to remove any loose debris, such as dirt, dust, cobwebs, and spider webs.
- If there is any grease buildup on the surface, use a solvent cleaner to remove it. You can use either a commercial solvent cleaner or create a homemade solution consisting of one part vinegar and one part water. Dip a clean cloth or rag in the solution and wipe down the surface.
- Rinse the surface thoroughly with clean water and let it dry.
- Inspect the surface for any rust spots. If you find any, you need to sand them down with sandpaper or wire brush to remove them completely.
- Finally, use painter’s tape to mask off any areas of the garage door that you don’t want the sealant to touch. This will give you a clean, finished look.
Surface preparation is a critical step in sealing the gaps at the top of your garage door. By following the above steps and using the necessary tools, you can prepare the surface adequately and ensure a long-lasting, well-sealed garage door.
Applying The Sealant
Garage doors are a vital part of a home that requires occasional attention. One of the primary issues homeowners face is the gap at the top of their garage door. The gap can lead to air leaks, which is bad news for your energy bills.
Fortunately, you can seal the gap using a sealant, which is an easy diy task. In this blog post, we will outline the process of applying sealant to the gaps in a garage door in three simple steps.
Step 1: Gather The Necessary Tools And Materials
Before sealing the gap, ensure you have all the required tools and materials to avoid any inconvenience.
- Caulking gun
- A foam sealant
Step 2: Choose A Suitable Application Method
Two types of sealants are commonly used to seal the gaps in a garage door: a foam sealant and a latex/acrylic sealant.
Caulking Gun
- Load the caulking gun with the sealant
- Cut the tip of the caulking gun with a knife
- Apply the sealant along the gap in a straight line
Foam Sealant
- Spray the foam sealant along the gaps
- Wait for the foam to expand and fill the gaps
- Cut off any excess foam
Step 3: Apply The Sealant
Once you have selected your desired method, you can apply the sealant to the gap.
- Hold the caulking gun at a 45-degree angle while applying the sealant
- Use a caulking smoothing tool or a damp finger to smooth the sealant and spread it evenly across the gap
- Please don’t use too much sealant, as it can cause a mess
- Be patient and allow the sealant to dry before closing the garage door
Sealing the gap at the top of your garage door is an easy diy task. By following the steps mentioned above, you can seal the gap and prevent air leaks. A properly sealed garage door can save you money on energy bills and keep your garage clean and dry.
How To Ensure Your Garage Door Is Energy Efficient
Garage doors are an essential component of any home. They offer protection for your vehicle and other belongings while also increasing the home’s curb appeal. However, these doors can also have gaps, allowing for heat transfer, which can impact both temperature regulation and energy bills.
Discuss How Sealing Gaps At The Top Of A Garage Door Can Contribute To Energy Efficiency
One of the most common areas where a garage door can lose energy is through the gap at the top. This gap, although small, can have a significant impact on the amount of energy used to heat and cool your home.
- Install a weatherstrip: A weatherstrip is a significant investment and offers the best results for sealing the gap at the top of your garage door. It comes in various lengths, making it easy to fit any size gap.
- Use a garage door seal: A garage door seal is also an effective way of sealing the gaps around the garage door. It is easy to install and offers an instant solution to the problem of energy transfer.
- Add insulation: Insulating the garage door will not only help with the gaps but also increase energy efficiency. The insulation keeps the heat inside during winter and outside during summer.
Outline Additional Steps Homeowners Can Take To Improve The Energy Efficiency Of Their Garage Door
Sealing the gap at the top of your garage door is a great starting point, but there are additional measures you can take to further enhance efficiency.
- Weatherstripping for sides and bottom: Weatherstripping around the sides and bottom of the garage door will prevent drafts and heat transfer. It is easy to install and comes in various sizes.
- Upgrade to an energy-efficient garage door: If your garage door is outdated, consider investing in a new, energy-efficient model. These doors feature improved insulation and effectively seal gaps.
- Upgrade lighting: Consider upgrading to energy-efficient lighting, such as LED bulbs. It will save you money and reduce energy consumption.
Provide Quantitative Data Or Statistics To Reinforce The Importance Of Energy Efficiency
According to the U.S. Department of Energy, heating and cooling account for up to 50% of the energy used in an average home. A single uninsulated garage door can account for 20% of this energy loss. Sealing gaps in the garage door and insulating can help reduce energy bills by up to 15%.
Investing in an energy-efficient garage door can also significantly reduce energy consumption. It is, therefore, essential to ensure your garage door is energy-efficient to save on energy bills.
Frequently Asked Questions About How To Seal the Gap At the Top Of the Garage Door
Why should I seal gaps at the top of my garage door?
Sealing gaps at the top of your garage door helps prevent drafts, pests, and moisture from entering your garage, keeping it more comfortable and secure.
What tools and materials are needed to seal gaps at the top of my garage door?
Typically, this task requires weatherstripping, a measuring tape, a utility knife, and a screwdriver.
How do I accurately measure the gap at the top of my garage door?
Measure the width of the gap at multiple points along the top of the door to ensure accuracy, then choose weatherstripping that matches this measurement.
What type of weatherstripping is most effective for sealing gaps in a garage door?
Choose a weatherstripping material that suits your climate, such as vinyl, rubber, or foam. Additionally, consider one that’s designed to withstand extreme temperatures.
Can I seal the gaps on my garage door by myself, or should I hire a professional?
Sealing gaps at the top of your garage door is a DIY-friendly task for most homeowners. However, consulting a professional is a good idea if you need more clarification or the gaps are extensive.
Are there any safety precautions I should take while sealing the gaps in my garage door?
Exercise caution when working with tools and climbing ladders. Ensure the garage door opener is disconnected to avoid accidents.
How often should I check and reseal the gaps at the top of my garage door?
Regularly inspect the weatherstripping for wear and tear. Depending on the material and climate, you may need to replace it every 1-2 years or as needed to maintain an effective seal.
Conclusion
Now that you have learned about the importance of sealing the gap at the top of your garage door and the various methods you can use to do so, you can easily take the next step and tackle this project on your own.
Remember, a properly sealed garage door not only keeps drafts and pests out, but it also helps improve energy efficiency and lower utility bills. Don’t forget to regularly inspect and maintain the seal to ensure it’s still in good condition and functioning properly.
Utilize the techniques and products that we discussed in this article, and you will have a well-insulated garage in no time. Additionally, if you encounter any difficulties, don’t hesitate to seek help from a professional. With these tips and tricks, you are now equipped to take care of your garage door and create a more comfortable living space for you and your family.