
Replacing a 22×64 door glass insert typically takes 45 to 90 minutes for most homeowners. This standard size fits many common entry door designs. Costs generally range from $150 to $500 depending on glass style and features. For a related glass-only option, see our sliding glass door replacement guide. Choose safety glazing appropriate to the door location and confirm the replacement with the door manufacturer; the U.S. Department of Energy’s window guidance explains glazing and energy-performance considerations. If you are considering a larger glass-only project, see our sliding glass door replacement guide. For commercial glazing considerations, see our commercial window glass replacement guide.
Home improvement experience shows door glass inserts commonly crack from storms, impacts, or age-related wear. Prompt replacement restores both appearance and energy efficiency.
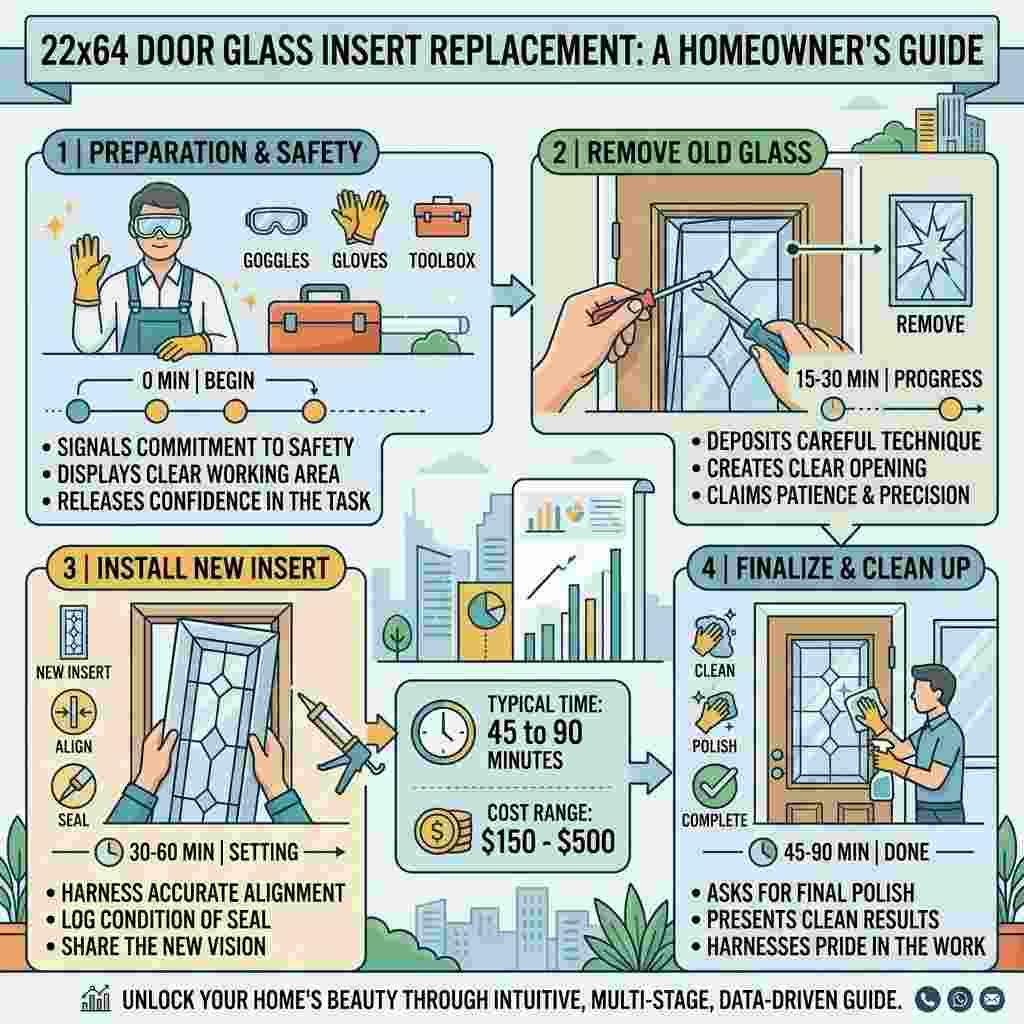
Table of Contents
Quick Answer
Replacement involves removing the interior and exterior frame trim, extracting the damaged insert, and installing a new 22×64 panel. Most inserts use a retainer clip or screw system for securing glass. Proper weatherstripping ensures an energy-efficient seal.
Safety note: wear gloves and eye protection when handling broken glass during removal. This prevents cuts from sharp edges or shattered fragments.
Step-by-Step Replacement Process
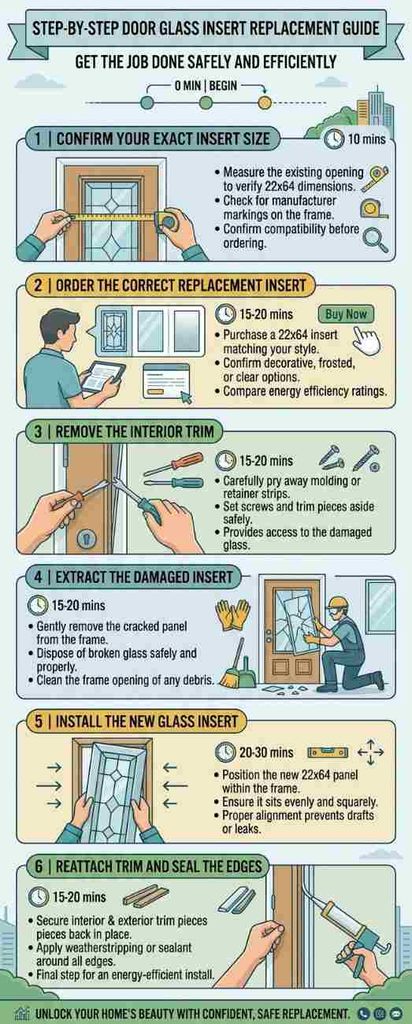
Step 1: Confirm Your Exact Insert Size [Time: 10 mins]
Measure the existing opening to verify 22×64 dimensions. Check for any manufacturer markings on the frame. This confirms compatibility before ordering replacement glass.
Step 2: Order the Correct Replacement Insert [Time: 15-20 mins]
Purchase a 22×64 insert matching your door’s style and glass type. Confirm whether you need decorative, frosted, or clear glass options. Compare energy efficiency ratings if available.
Step 3: Remove the Interior Trim [Time: 15-20 mins]
Carefully pry away the interior molding or retainer strips. Set screws and trim pieces aside safely. This provides access to the damaged glass insert.
Step 4: Extract the Damaged Insert [Time: 15-20 mins]
Gently remove the cracked glass panel from the door frame. Dispose of broken glass safely and properly. Clean the frame opening of any debris or old sealant.
Step 5: Install the New Glass Insert [Time: 20-30 mins]
Position the new 22×64 panel carefully within the frame opening. Ensure it sits evenly and squarely before securing. Proper alignment prevents future drafts or leaks.
Step 6: Reattach Trim and Seal the Edges [Time: 15-20 mins]
Secure the interior and exterior trim pieces back in place. Apply weatherstripping or sealant around all edges. This final step completes the energy-efficient installation.
Why proper sealing matters most: gaps around a poorly sealed door insert let in drafts, moisture, and energy loss. This undermines both comfort and heating or cooling efficiency. Careful sealing at every edge protects your home’s energy performance long-term.
Insert Type Comparison Table
| Insert Type | Energy Efficiency | Best For |
|---|---|---|
| Standard clear glass | Moderate | Basic visibility and light |
| Double-pane insulated | High | Energy efficiency priority |
| Decorative or frosted glass | Moderate to high | Privacy with style |
Home improvement insight: “Sealing is where most DIY door glass jobs fall short,” says contractor Vince Halloran. “Take the extra time there.”
Tips for a Lasting Installation
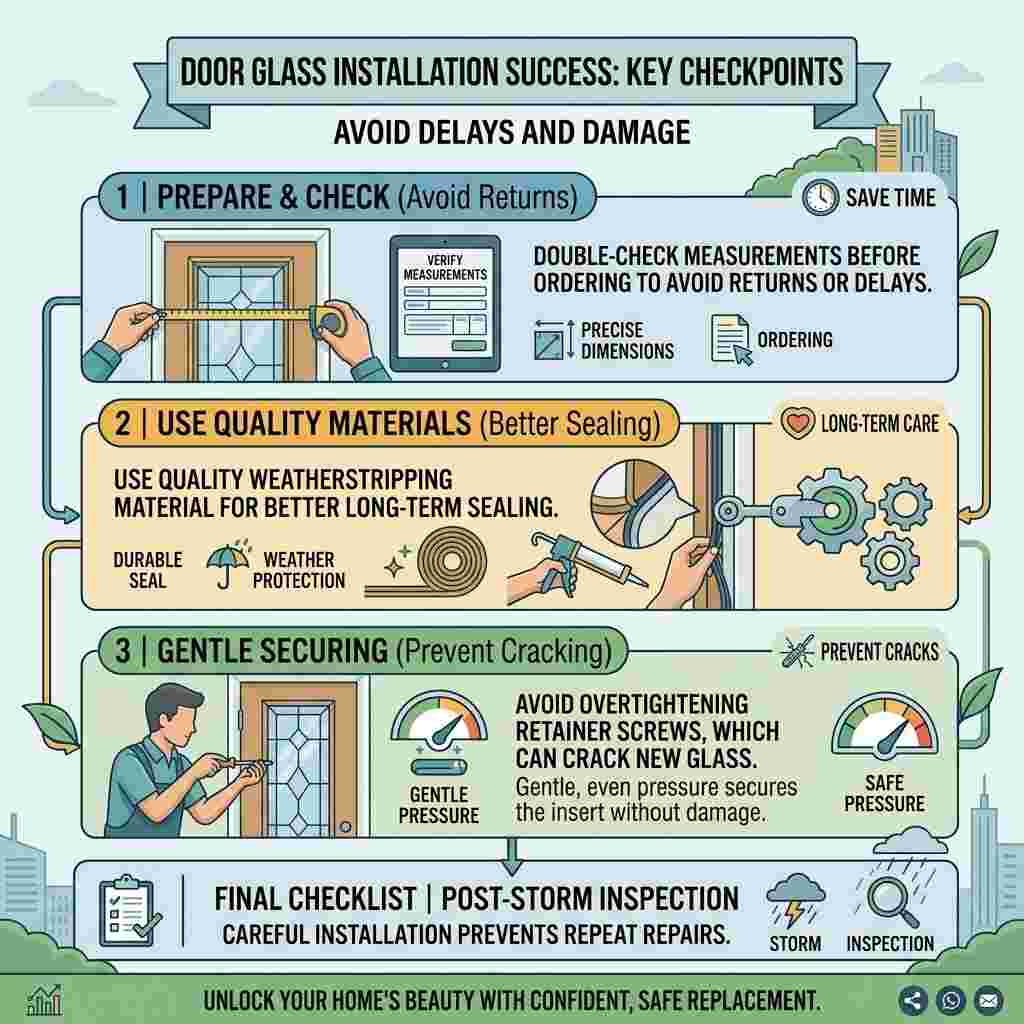
Double-check measurements before ordering to avoid returns or delays. Use quality weatherstripping material for better long-term sealing. Inspect the installation after the first heavy rain or storm.
Avoid overtightening retainer screws, which can crack new glass. Gentle, even pressure secures the insert without damage. Careful installation prevents the need for repeat repairs.
The Bigger Picture
Standard-sized door glass inserts remain popular for their wide availability and affordability. Homeowners increasingly prioritize energy-efficient options during replacement projects. This trend reflects broader interest in reducing home energy costs through smarter materials. For another approach to glass-door work, see our sliding glass door replacement guide.
Accurate measurement and careful sealing ensure a successful, lasting installation. Taking time with each step protects both function and appearance. Following this guide results in a properly fitted, energy-efficient door glass insert.
FAQs on 22×64 Door Glass Insert Replacement
Why does my door frame show slight gaps even though I ordered the correct 22×64 size?
Door frames can shift slightly over time due to settling or seasonal changes. This can create minor size discrepancies even with correctly sized replacement glass. Remeasuring your actual opening before ordering helps catch this issue. Small gaps can often be addressed with additional weatherstripping or shims. This is a more common issue in older homes with some settling.
Can I install a decorative glass insert if my original was plain clear glass?
Yes, as long as the decorative option matches the standard 22×64 dimensions. This upgrade opportunity often arises naturally during necessary replacement projects. Confirm the decorative style still meets any relevant building codes for your area. This is a popular way to enhance curb appeal during routine replacement. Many homeowners use this replacement as a chance for a style upgrade.
Why did my new glass insert arrive with a protective film I should remove?
Manufacturers often apply protective film to prevent scratches during shipping and handling. This film should be removed before or immediately after installation. Leaving it on too long can make removal more difficult due to adhesive bonding. Check both sides of the glass for this protective film before installing. This simple step ensures your new glass looks clear and pristine.
Does the door’s material affect how I approach glass insert replacement?
Yes, steel, fiberglass, and wood doors have slightly different trim and frame systems. This can affect how trim pieces detach and reattach during replacement. Research your specific door material’s typical construction before starting work. This preparation helps you anticipate any material-specific challenges during removal. This consideration matters most for less common or older door materials.
Why do some 22×64 inserts include a low-E coating option?
Low-E coatings help reflect heat while still allowing visible light through. This improves energy efficiency compared to standard, uncoated glass options. Since you’re already replacing the insert, this upgrade adds only modest cost. Many homeowners find the long-term energy savings worthwhile for this upgrade. Consider your local climate when deciding if this feature matters for you.
Can I reuse my original retainer clips with a new glass insert?
Yes, if they remain in good condition without cracks or significant wear. Inspect clips carefully during removal, since they experience stress over time. Replacing worn or brittle clips alongside the glass prevents future issues. This small additional cost protects your overall installation’s long-term reliability. This consideration matters most for older doors with aging original hardware.
Why does my new insert feel slightly thicker than the original glass?
Newer glass options, especially insulated or energy-efficient types, are often thicker. This thickness difference sometimes requires minor trim adjustment for proper fit. Confirm glass thickness specifications match your door’s designed accommodation before ordering. This detail matters most when upgrading to higher-performance glass options. Address any fit issues before fully securing the trim pieces.
Does humidity affect how well the new glass insert seals over time?
Yes, humidity and temperature changes can affect sealant and weatherstripping performance. This is a normal environmental factor affecting any door installation over time. Using quality, weather-appropriate sealing materials helps mitigate this effect significantly. Periodic inspection and resealing as needed maintains long-term performance. This ongoing maintenance protects your investment through seasonal changes.
Why do some homeowners choose tempered glass for their 22×64 insert replacement?
Tempered glass offers significantly better impact resistance than standard glass options. This added safety feature appeals to households with children or high-traffic entries. Building codes sometimes require tempered glass for certain door glass applications too. Confirm your local code requirements before finalizing your glass type selection. This safety consideration often justifies the modest additional cost involved.
Can I complete this replacement alone, or do I need a second person to help?
Most 22×64 inserts are manageable for one person to install alone. Having a second person helps with holding trim pieces steady during installation though. This assistance becomes more valuable for larger or heavier glass options specifically. Consider your comfort level and the specific insert’s weight when deciding. This is a reasonable, moderate DIY project for most homeowners regardless.
1 thought on “22×64 Door Glass Insert Replacement Guide”